Description: Mininet has a useful Graphical User Interface (GUI) known as Miniedit. MiniEdit is a notable experimental tool to demonstrate how Mininet can be extended. MiniEdit has a very simple user interface canvas with icons representing various tools like the Select tool, Switch tool, Host tool, Legacy Switch tool, and Legacy Router tool. This sample describes how to use MiniEdit for creating and running network simulations. It also illustrates the usage of MiniEdit to build and design a network, disposition network elements, save topology and run the simulation. It also supports beginning the MiniEdit simulation scenarios by clicking on the Run button on the MiniEdit GUI. It exhibits messages showing the simulation startup's progress and the Miniedit CLI prompt.
Install Ubuntu Server on a VM.
Procedure to Start MiniEdit
The MiniEdit script can be located in Mininet’s examples folder. To run MiniEdit, execute the following command:
$ sudo ./mininet/examples/miniedit.py
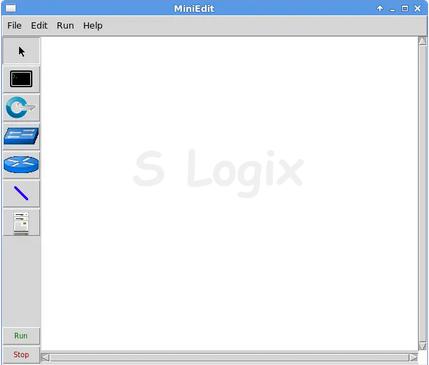
User Interface of MiniEdit
MiniEdit maintains a simple user interfaces that facilitates and presents a canvas with a row of tool icons on the left side of the window and a menu bar along the top of the window.
The icons represent the following tools:
1. Select Tool
The select tool is employed to maneuver nodes around the canvas. Click and drag any existing node. Curiously the select tool isn’t required to pick a node or link on the canvas. To pick an existing node or link, simply hover the mouse pointer over it. This work despite the tool that is presently active. So either right-clicks to reveal a configuration menu for the chosen component or press the delete key to get rid of the chosen component.
2. Host Tool
The host tool enables to create nodes on the canvas that may perform the function of host computers. Click on the tool, then click any place on the canvas you would like to put a node. As long as the tool remains designated, you can keep adding hosts by clicking any place on the canvas. The user could tack every host by right-clicking on that and selecting properties from the menu.
3. Switch Tool
The Switch tool enables the user to create OpenFlow-enabled switches on the canvas. These switch area units are expected to be connected to a controller. The tool operates a similar approach because the Hosts tool is on top. The user might tack every switch by right-clicking on that and selecting Properties from the menu.
4. Legacy Switch Tool
The legacy Switch tool creates a learning local area network switch with default settings. The switch can operate severally, while not a controller. The legacy switch can't be designed and is about up with Spanning Tree disabled. Thus, don't connect legacy switches in an exceeding loop.
5. Legacy Router Tool
The Legacy Router is a useful tool to create a basic router that will operate severally, not a controller. It's primarily simply a bunch with information processing forwarding enabled. The inheritance router can't be designed from the MiniEdit graphical user interface.
6.NetLink Tool
The NetLink tool is useful to create links between nodes on the canvas. Produce links by choosing the NetLink tool, then clicking on one node and dragging the link to the target node. The user could assemble the properties of every link by right-clicking thereon and selecting Properties from the menu.
7. Controller Tool
The Controller tool creates a controller. Multiple controllers may be supplemental. MiniEdit creates a mininet OpenFlow reference controller by default that implements the behavior of a learning switch. An alternative controller variety may be organized. The user could assemble the properties of every controller by right-clicking thereon and selecting Properties from the menu.
 Research Breakthrough Possible @S-Logix