How to Deploy an Nginx Web Server on Amazon ECS using Fargate?
Share
Condition for Deploy an Nginx Web Server on Amazon ECS using Fargate
Goal:
Create a Fargate task definition
Add Nginx container
Run Task with Public IP
Open Nginx in browser
Description: To deploy the publicly accessible Nginx web server on Amazon ECS using AWS Fargate. You begin by creating a new Fargate task definition that uses the Linux/x86_64 platform and the default awsvpc network mode, followed by allocating minimal compute resources. Inside the task definition, you add an Nginx container using the nginx:latest image and expose port 80, enabling the container to serve web traffic. After the task definition is created, you launch the task inside an ECS cluster using a public subnet and ensure that Auto-assign Public IP is enabled so the Nginx server can be accessed from the internet. Once the task is running, ECS provides a public IPv4 address, which you can open in a browser to verify the deployment. Seeing the default “Welcome to nginx!” page confirms that your Nginx container is successfully running on ECS Fargate and reachable publicly.
Steps
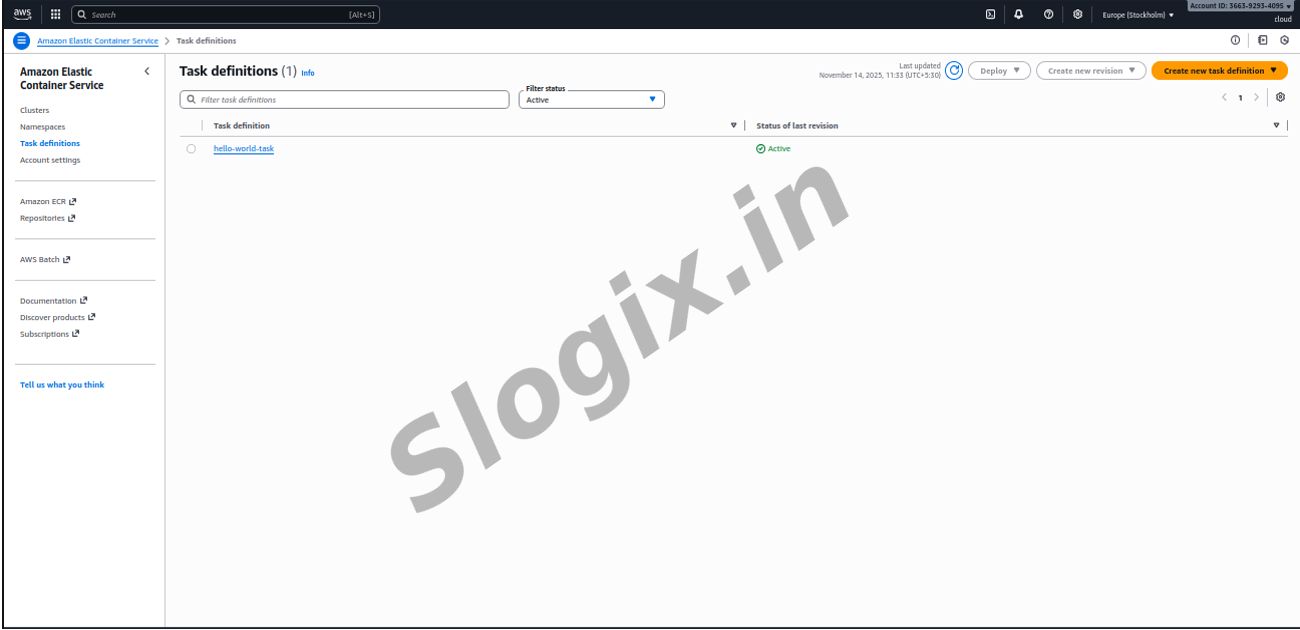
STEP 1 — Create a Fargate Task Definition
Go to AWS Console → ECS
Left menu → Task definitions
Click Create new task definition
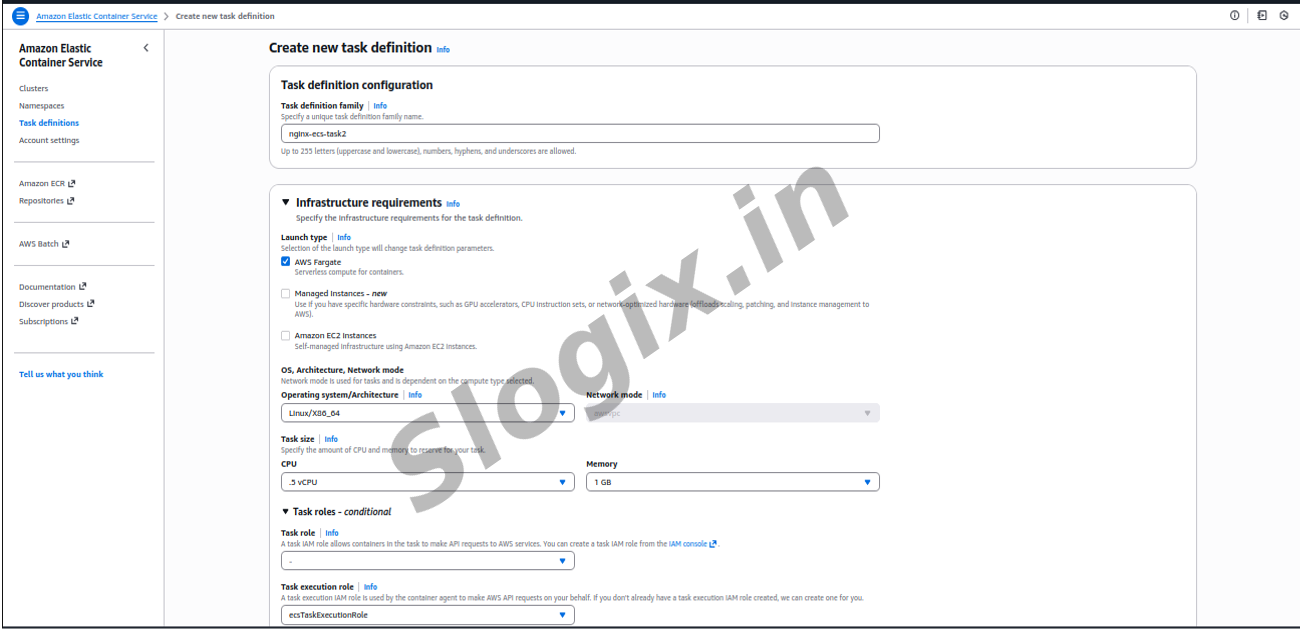
Under Infrastructure requirements, choose:
Launch type → AWS Fargate
Select:
Operating system/Architecture → Linux / x86_64
Network mode → awsvpc (default)
Task size:
CPU: 0.25 vCPU
Memory: 0.5 GB (512 MiB)
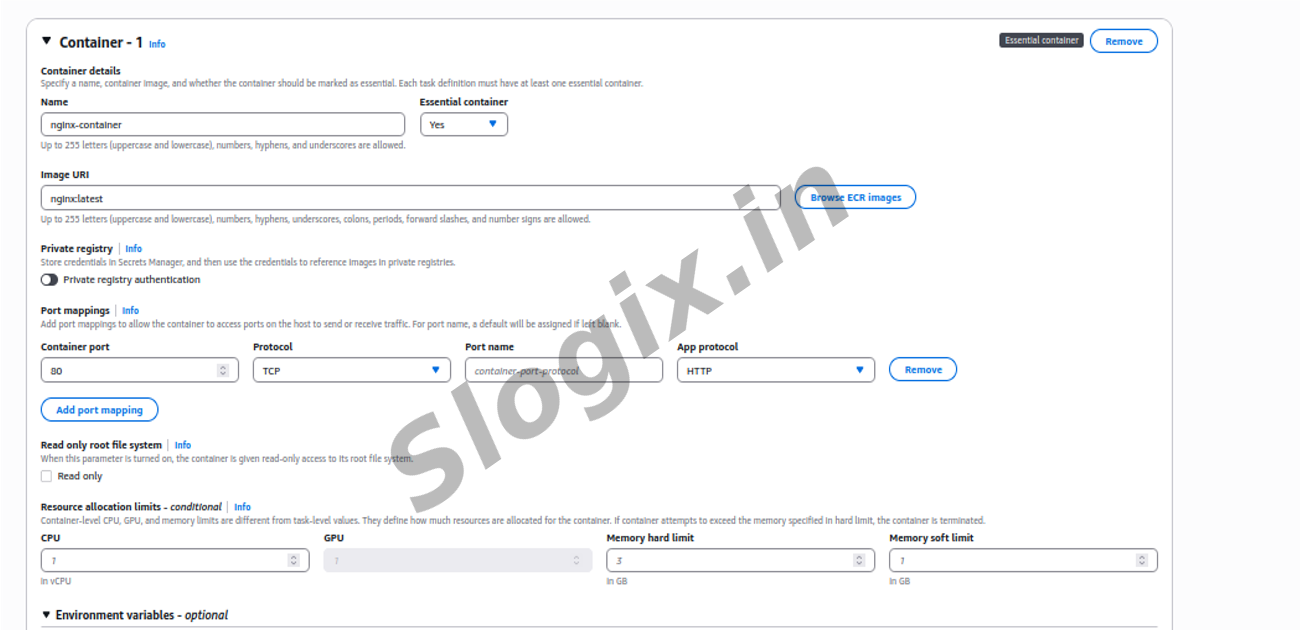
STEP 2 — Add Nginx Container
Scroll to Container - 1
Name:
nginx-container
Container image URI:
nginx:latest
Essential container → Keep Enabled
Port mapping:
Click Add port mapping
Enter:
Container port: 80
Protocol: TCP
This exposes NGINX web server.
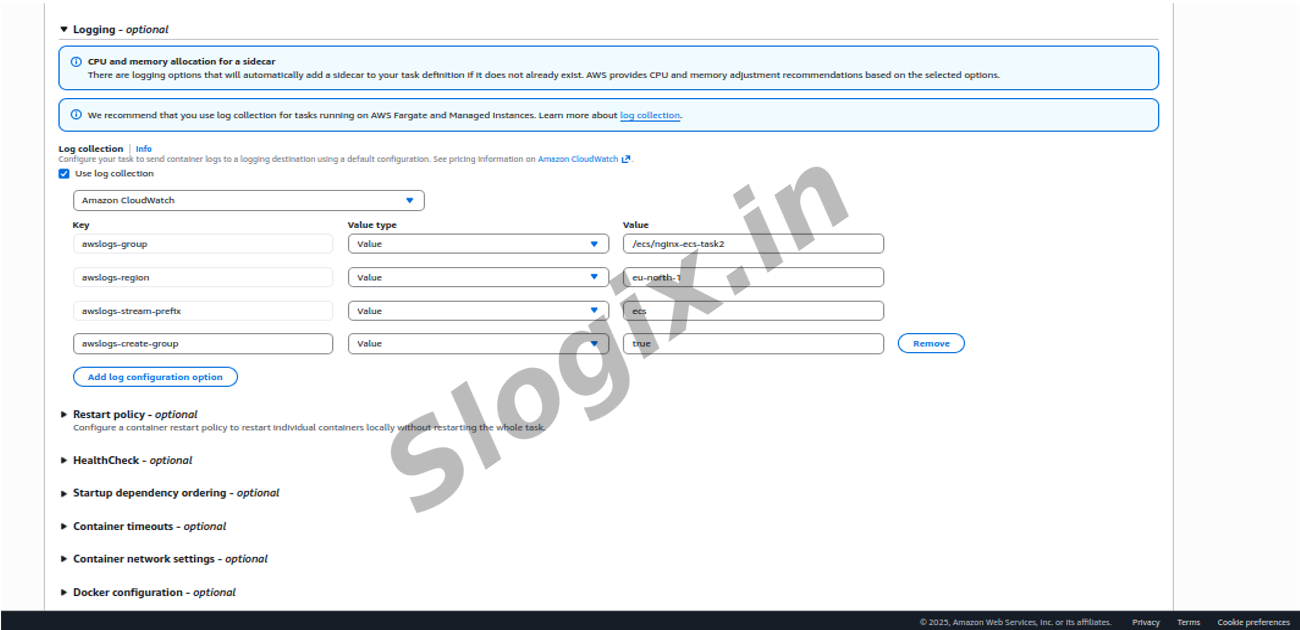
Enable logging:
Log collection → Enable
Scroll down → Click Create
Your Nginx task definition is ready.
STEP 3 — Run the NGINX Task
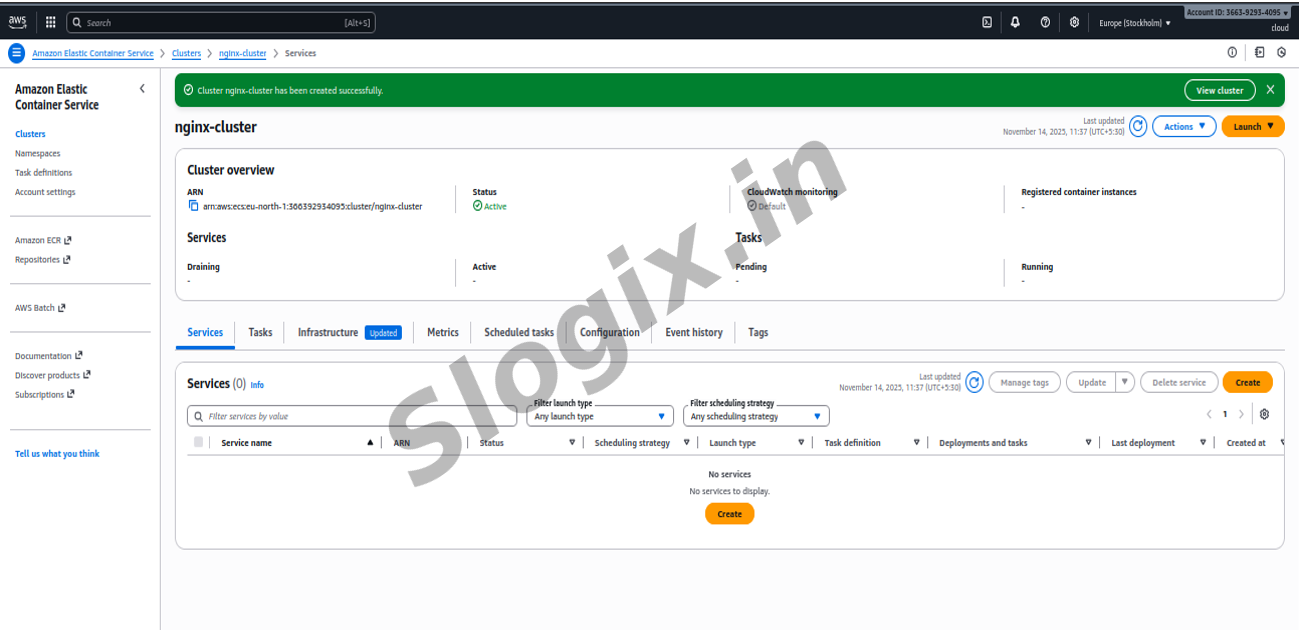
Go to ECS → Clusters
Select your Fargate cluster
(If you don’t have one, create: “Networking only (Fargate)”)
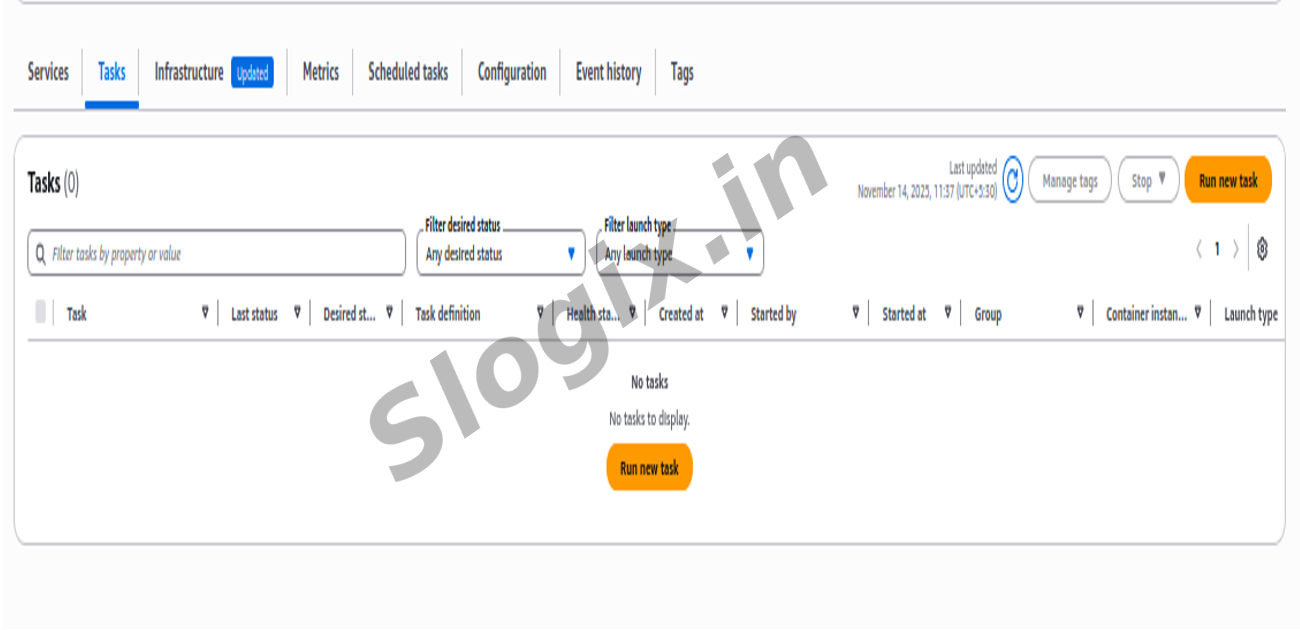
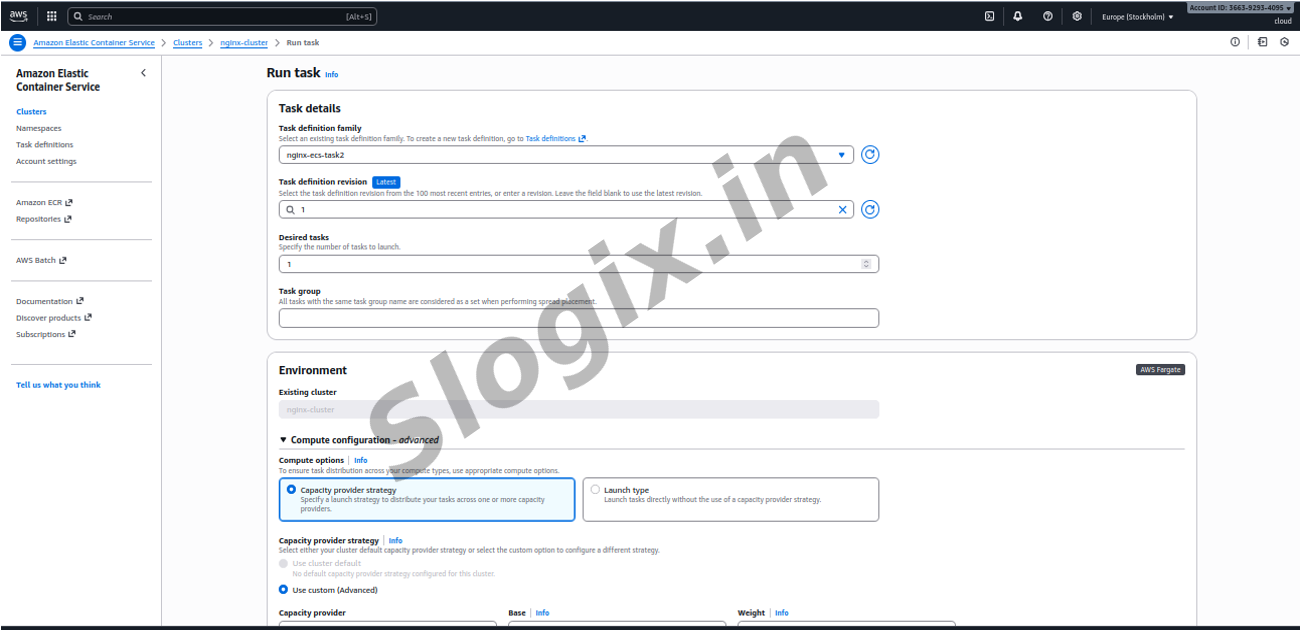
Click Run new task
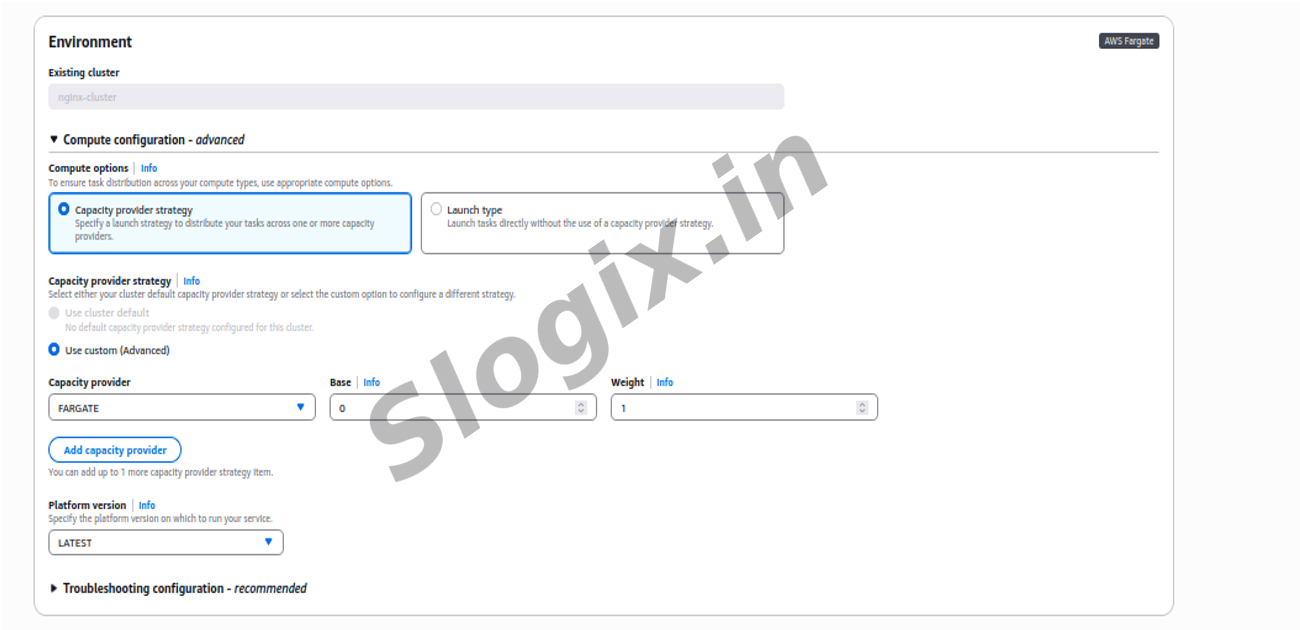
Fill details:
Launch type: FARGATE
Task definition: Select nginx-task (latest revision)
Cluster: Select your cluster
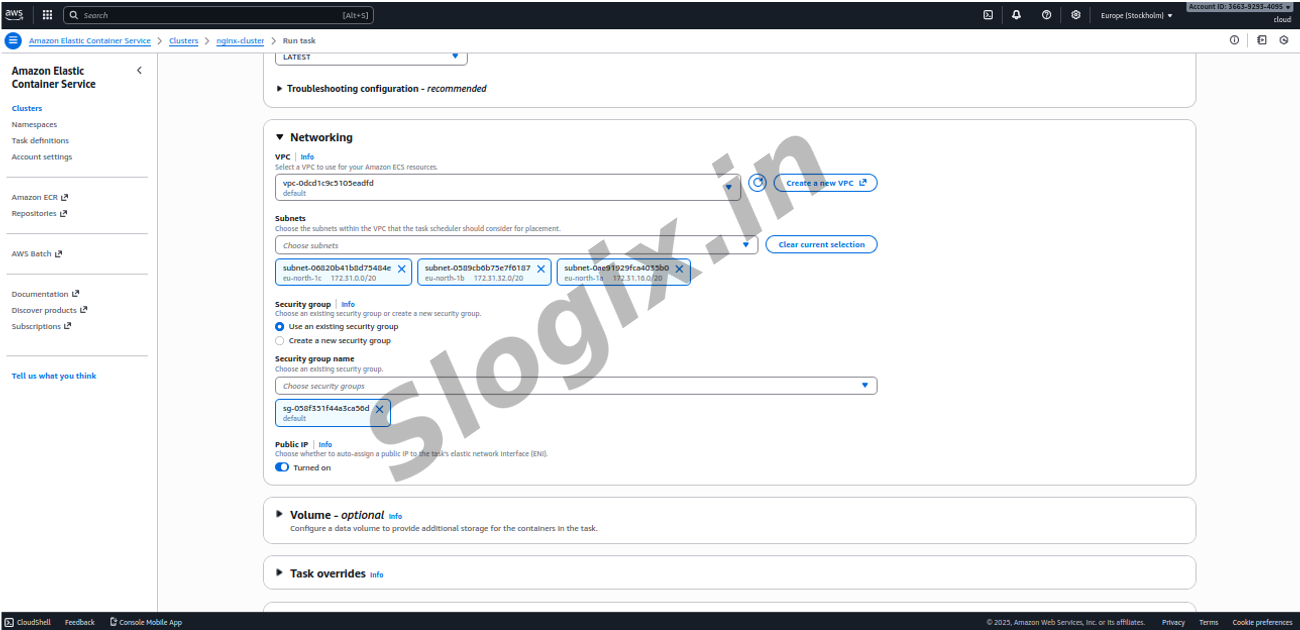
VPC: Choose default VPC
Subnets: Select any PUBLIC subnet
(Usually with “us-east-1a public” or similar)
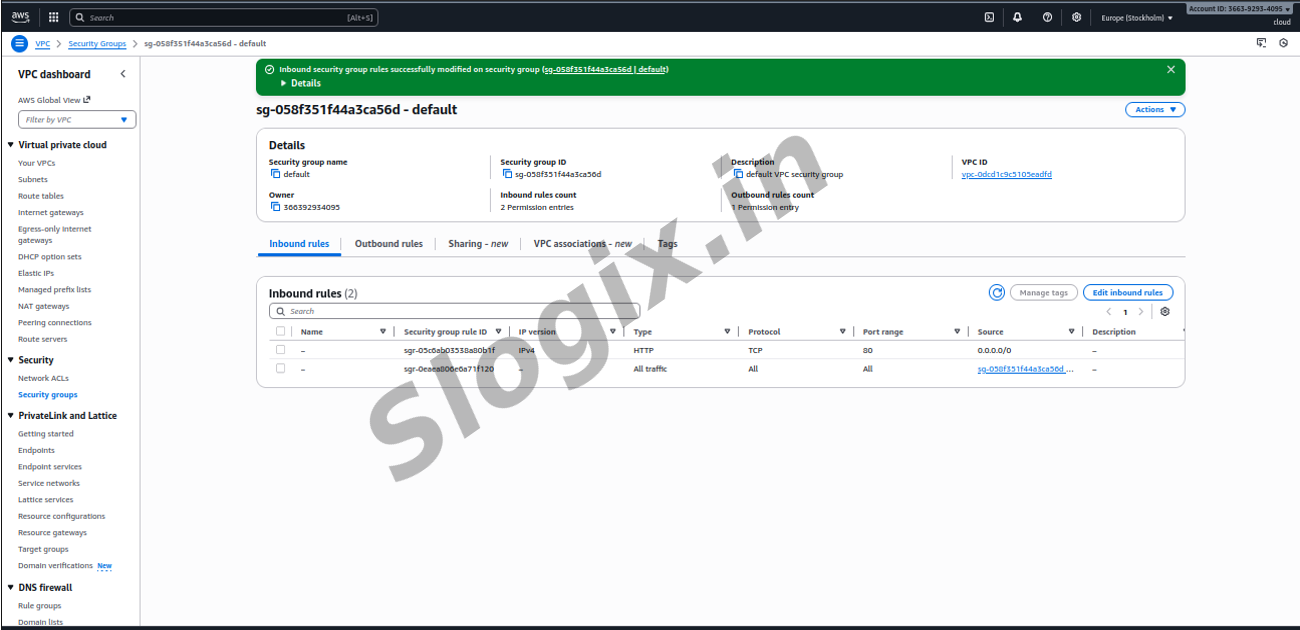
Set security group for access HTTP in inbound rule
Auto-assign Public IP: ENABLE
IMPORTANT: Without this Nginx will not be reachable from browser.
Scroll → Click Run Task
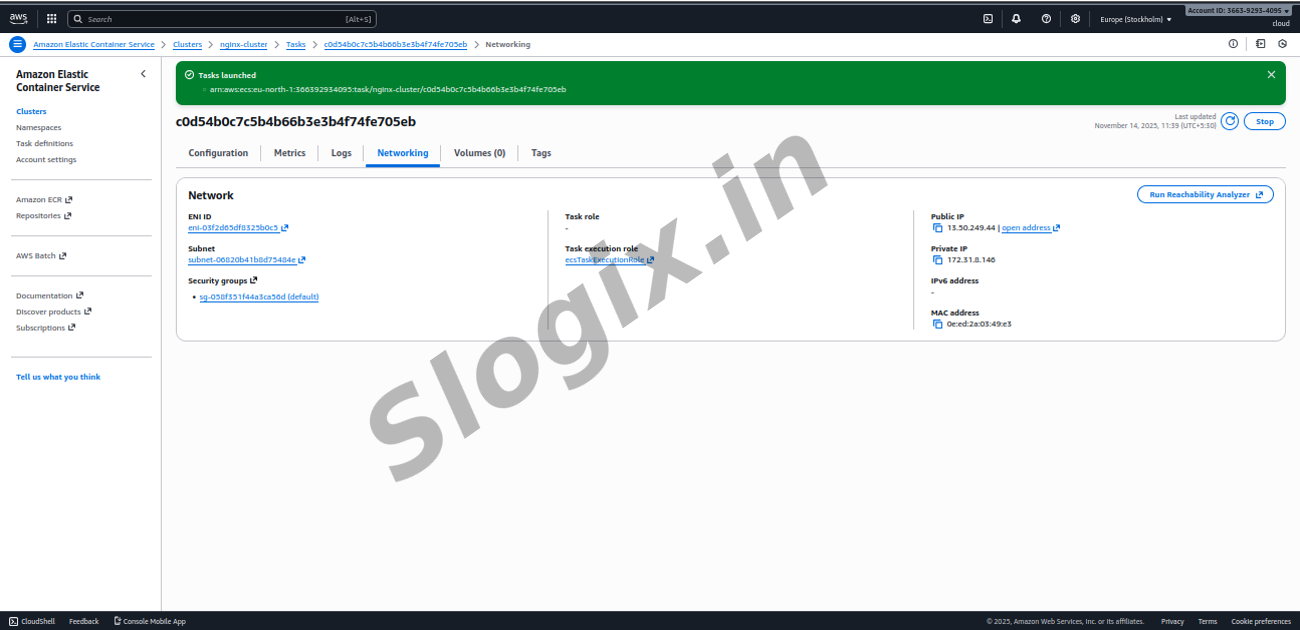
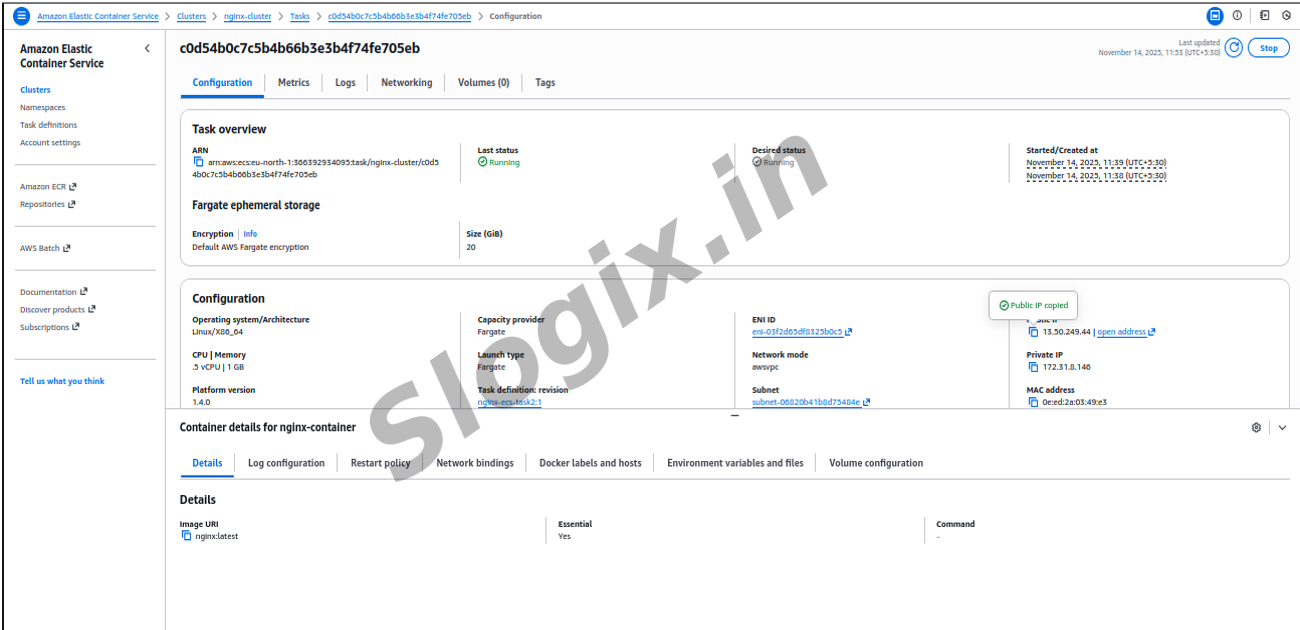
STEP 4 — Get Public IP of Task
Go inside the Tasks tab
Click on the running task
Scroll down to Networking
go to: Public IPv4 address: 3.x.x.x
Copy this IP.
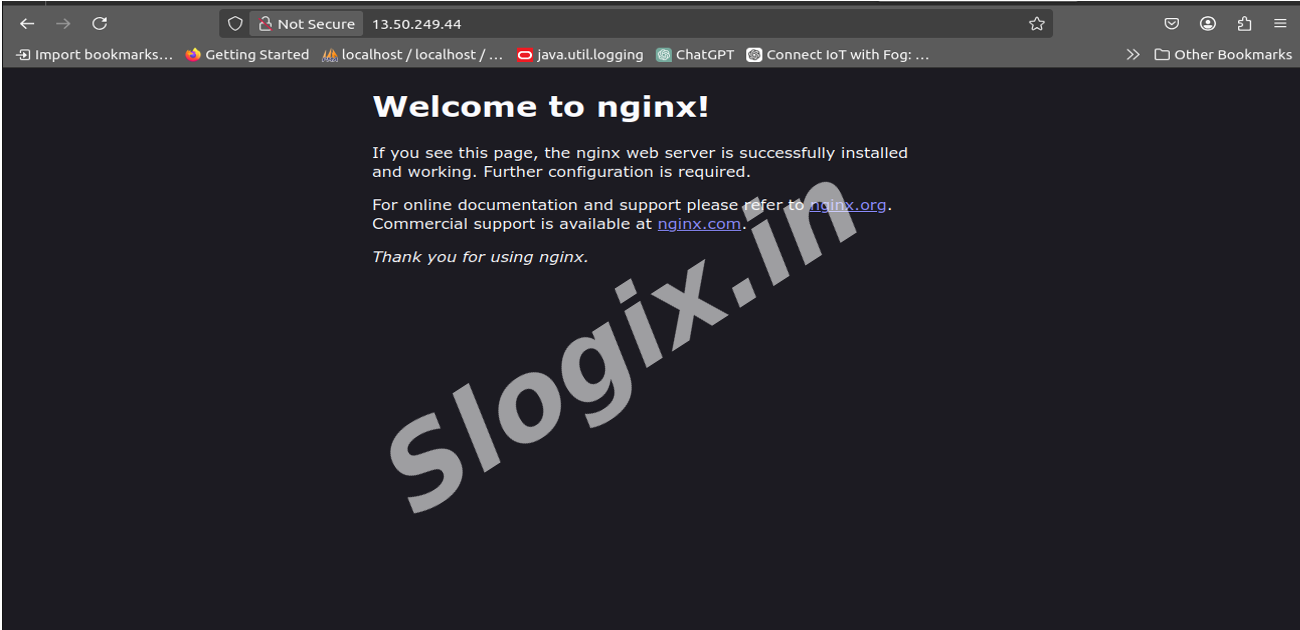
STEP 5 — Open NGINX in Browser
Open:
http://YOUR_PUBLIC_IP/
You will see:
"Welcome to nginx!"
This confirms your ECS task is working publicly.
 Research Breakthrough Possible @S-Logix