-
Step 1 — Create the Shell Script File on Ubuntu
Open the terminal.
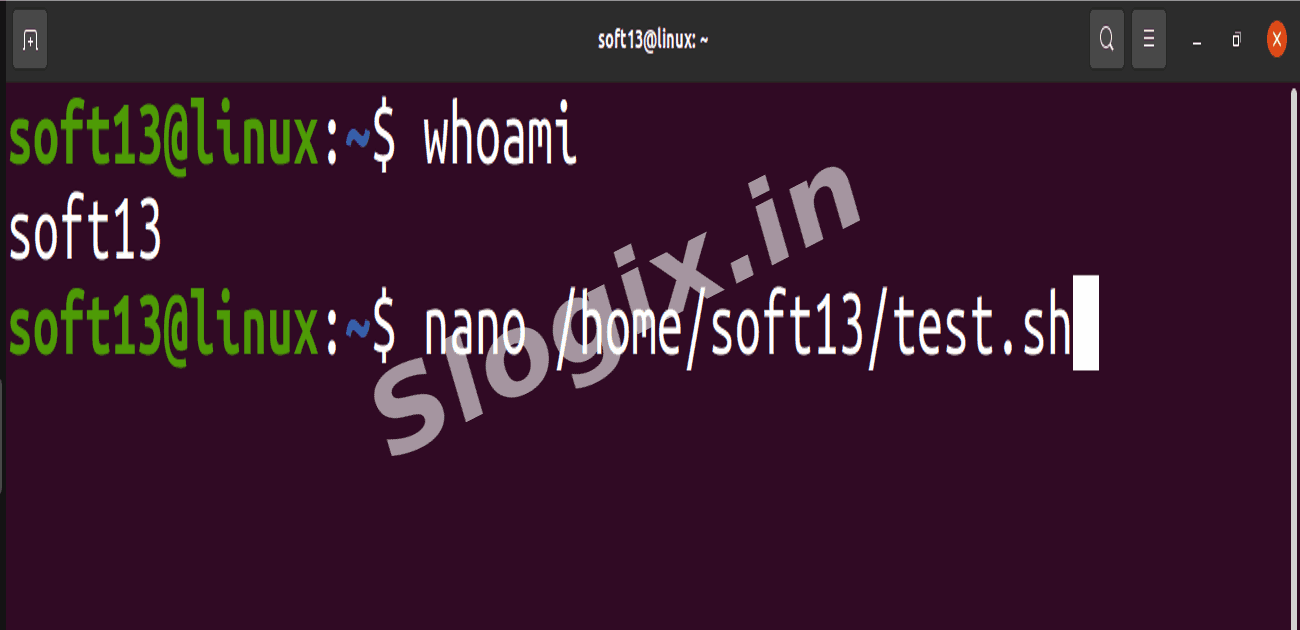
Find your username:
whoami
Create the script using nano (replace youruser with your username):
nano /home/soft13/test.sh
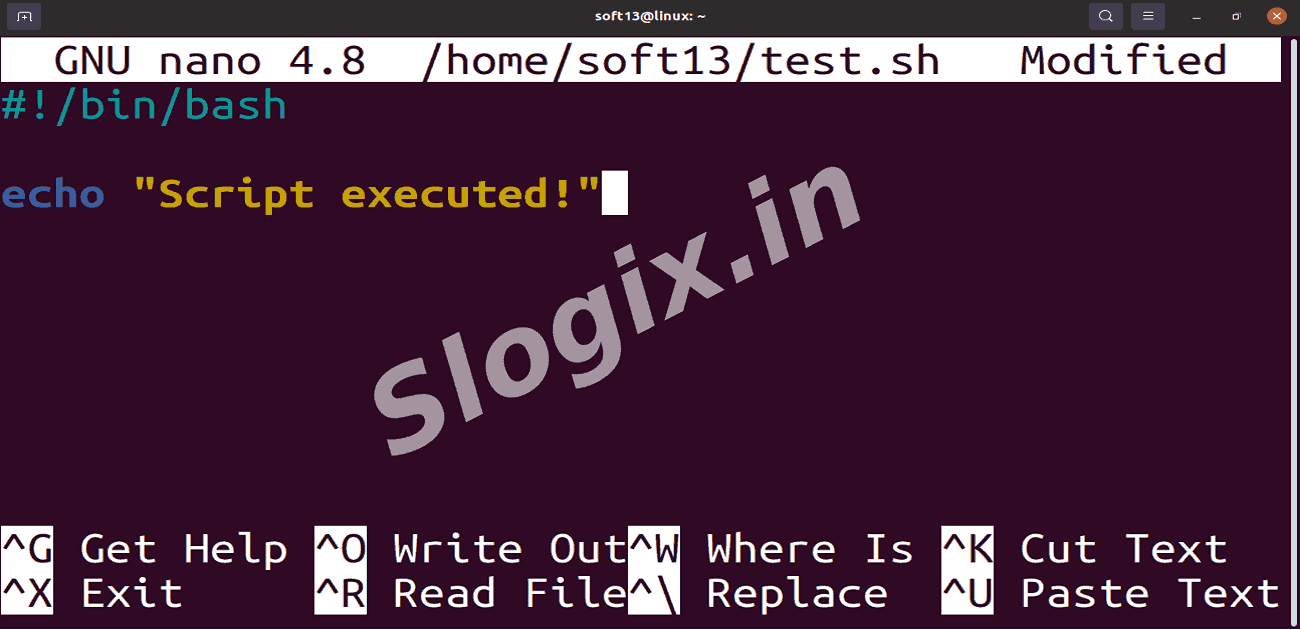
Paste the following content into the file:
#!/bin/bash
echo "Script executed!"
Save and exit: CTRL + O → Enter → CTRL + X
-
Step 2 — Make the Script Executable
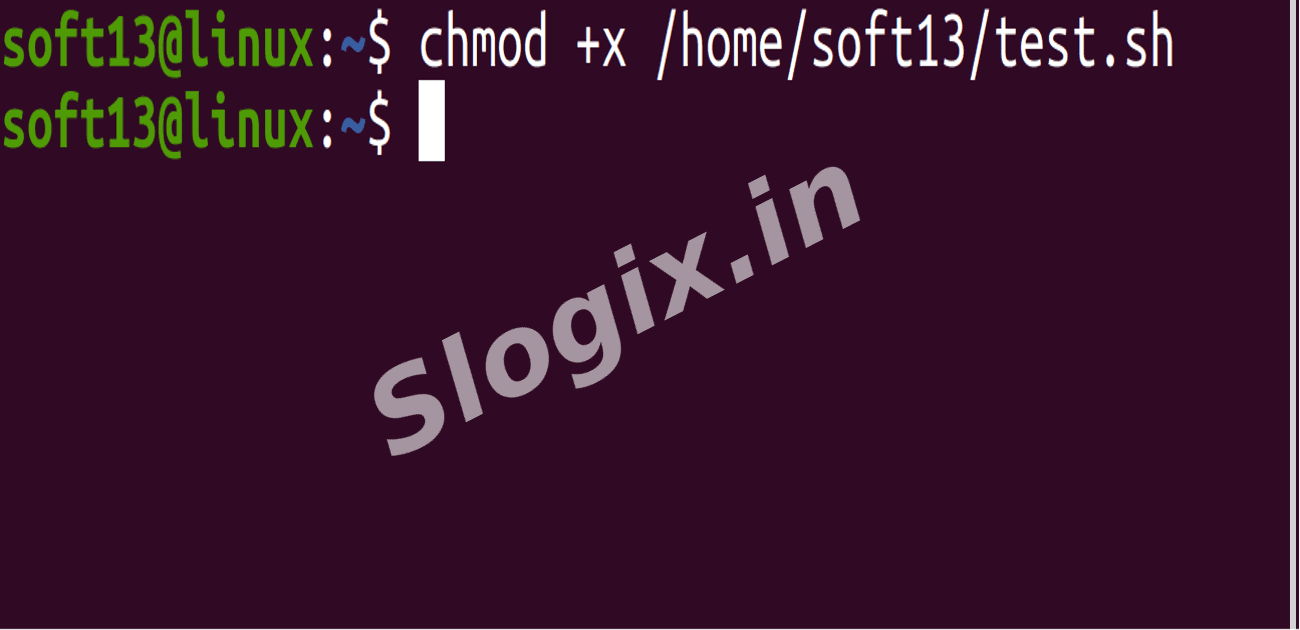
Run:
chmod +x /home/soft13/test.sh
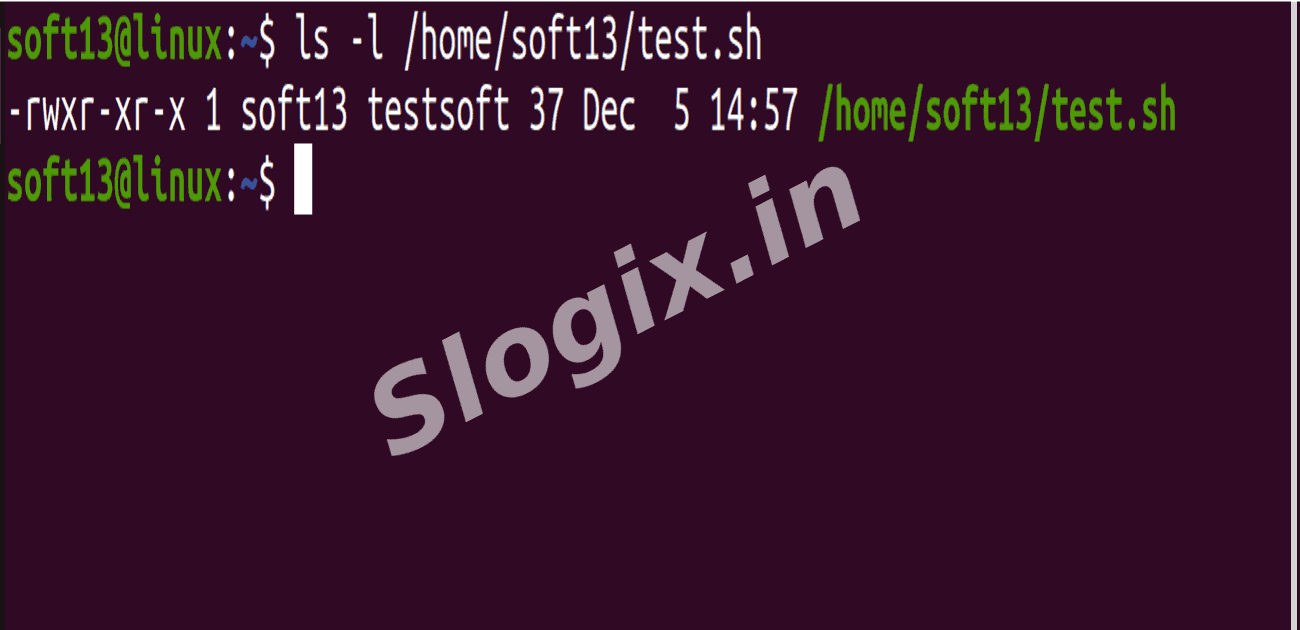
Verify permissions:
ls -l /home/soft13/test.sh
You should see: -rwxr-xr-x test.sh
-
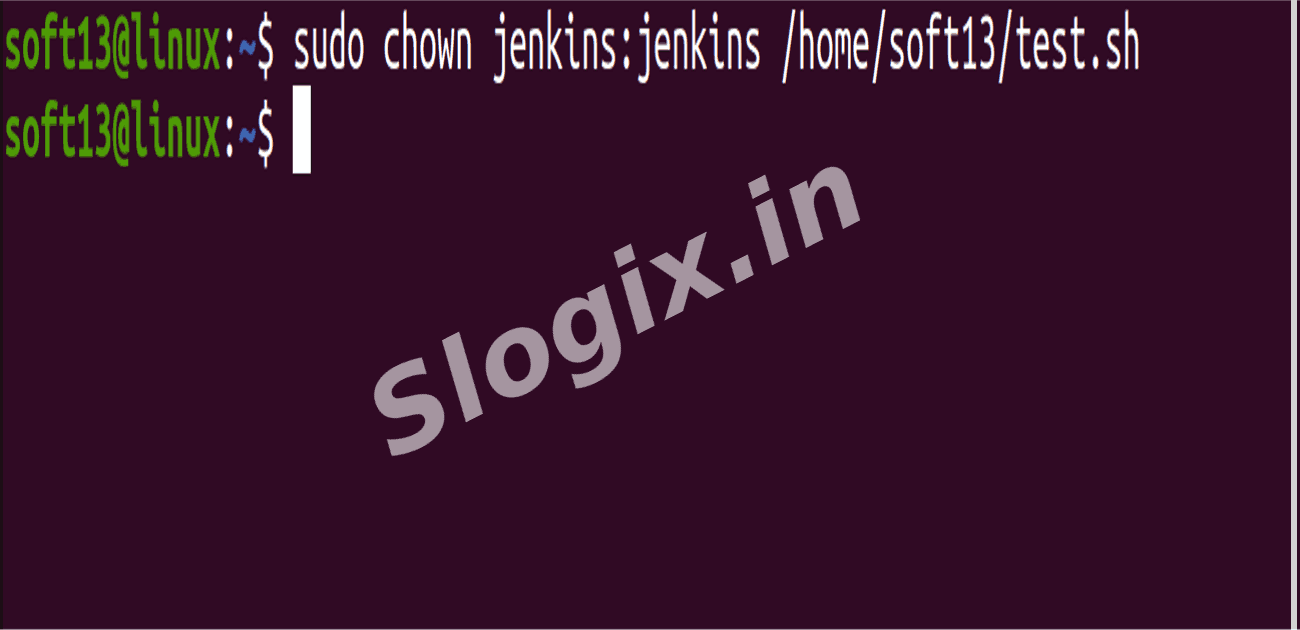
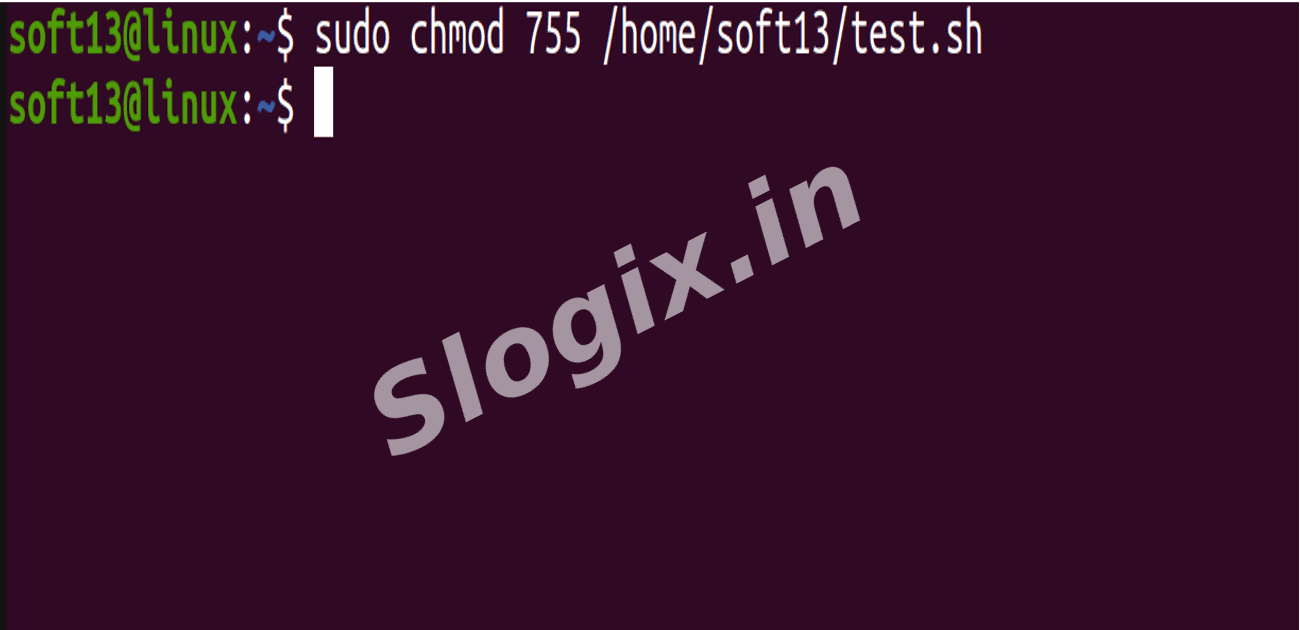
Step 3 — Give Jenkins Permission to Run the Script
Jenkins runs as user jenkins, so assign ownership and permissions:
sudo chown jenkins:jenkins /home/soft13/test.sh
sudo chmod 755 /home/soft13/test.sh
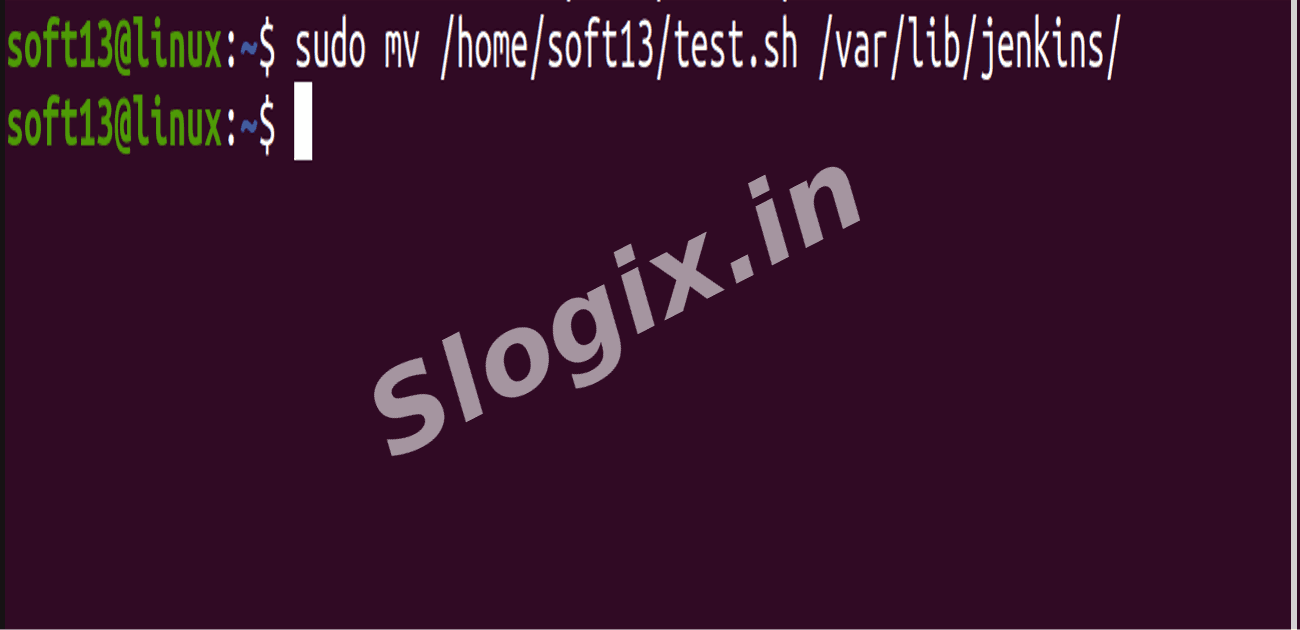
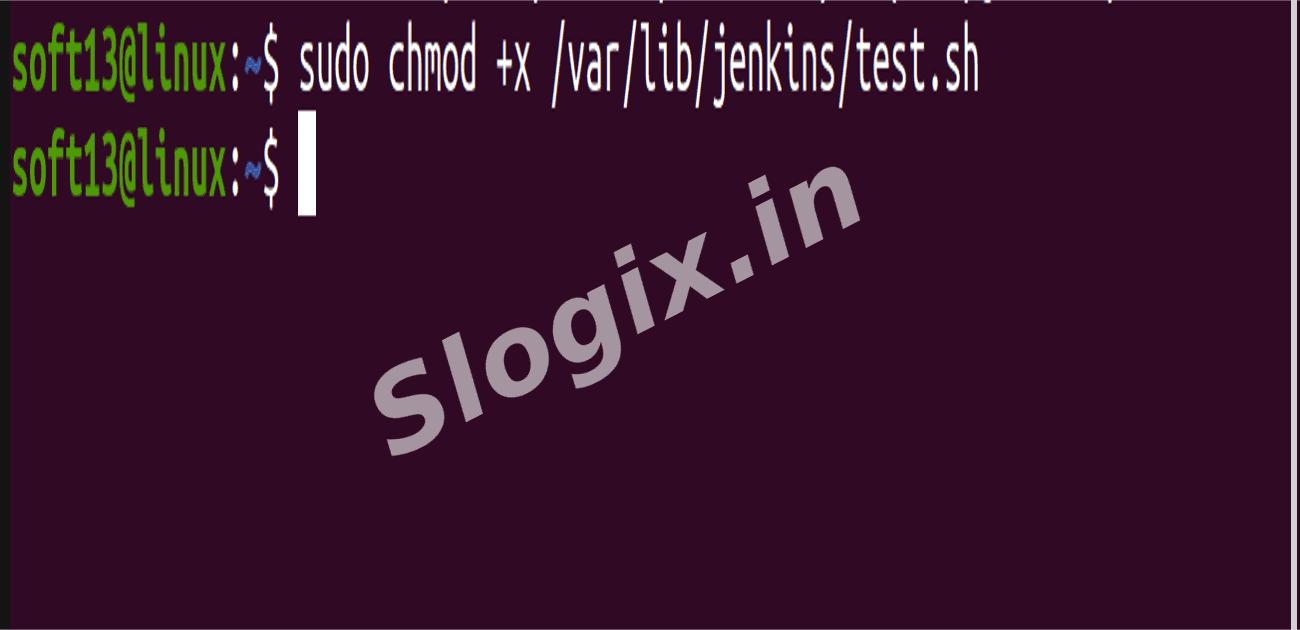
Alternatively, move the script to a Jenkins-friendly folder:
sudo mv /home/soft13/test.sh /var/lib/jenkins/
sudo chmod +x /var/lib/jenkins/test.sh
-
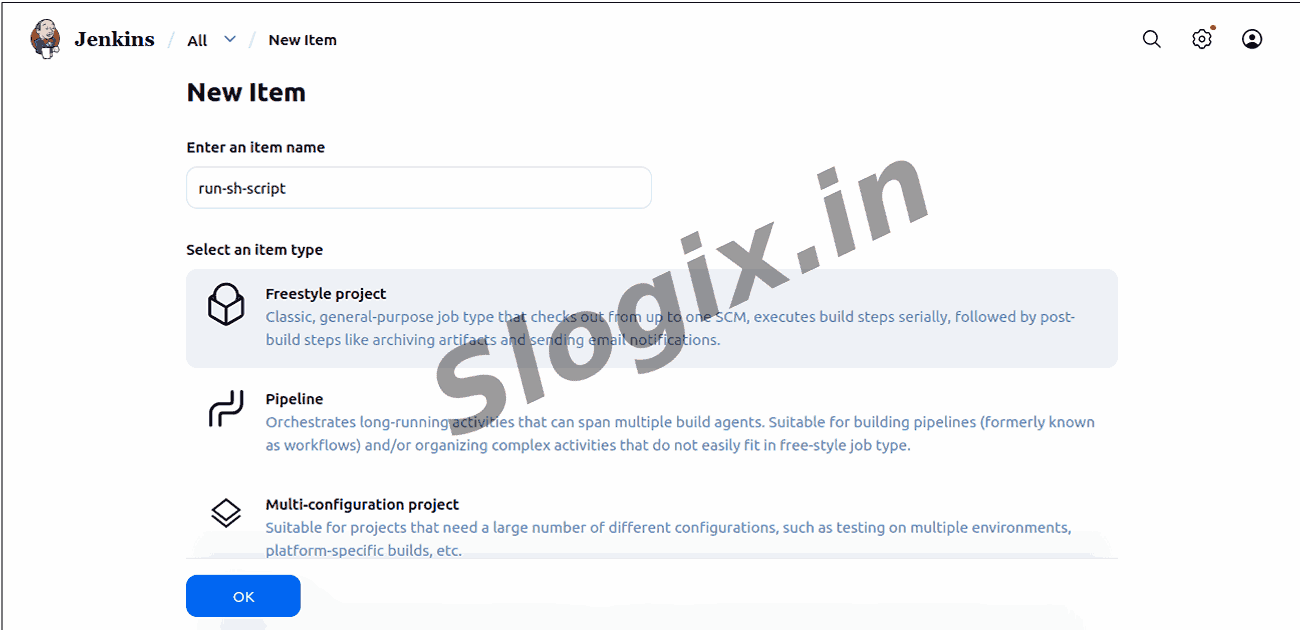
Step 4 — Create a Jenkins Job
Open Jenkins Dashboard → Click New Item
Enter Job Name: run-sh-script
Select Freestyle Project → Click OK
-
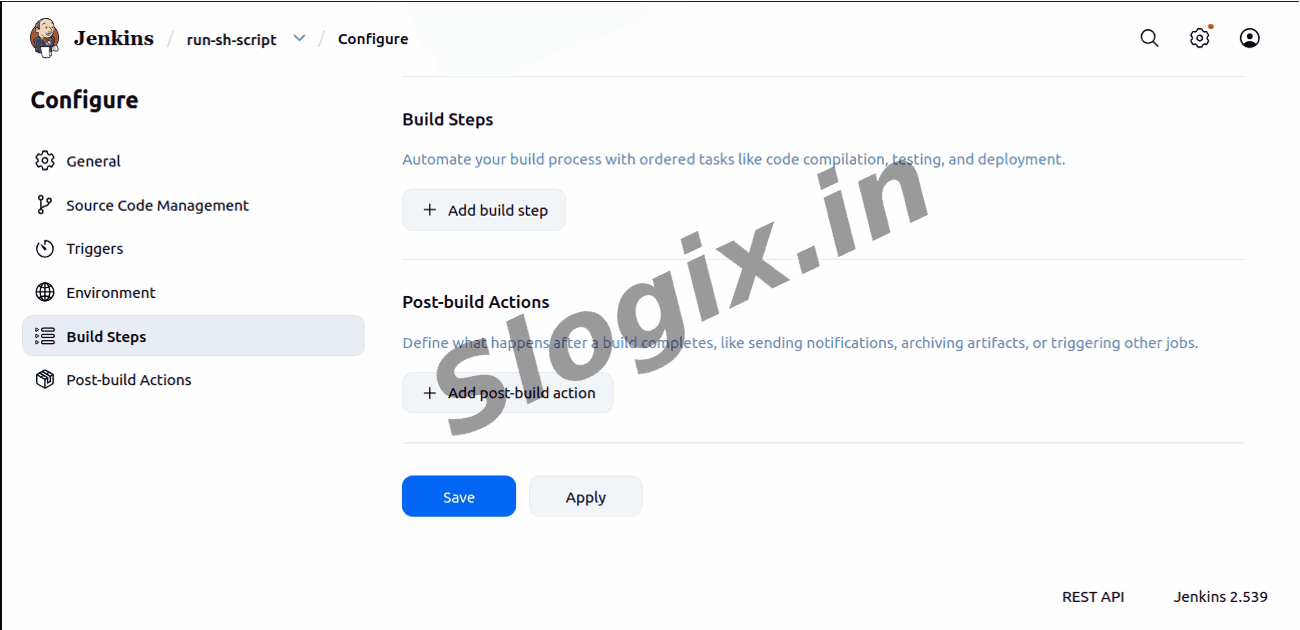
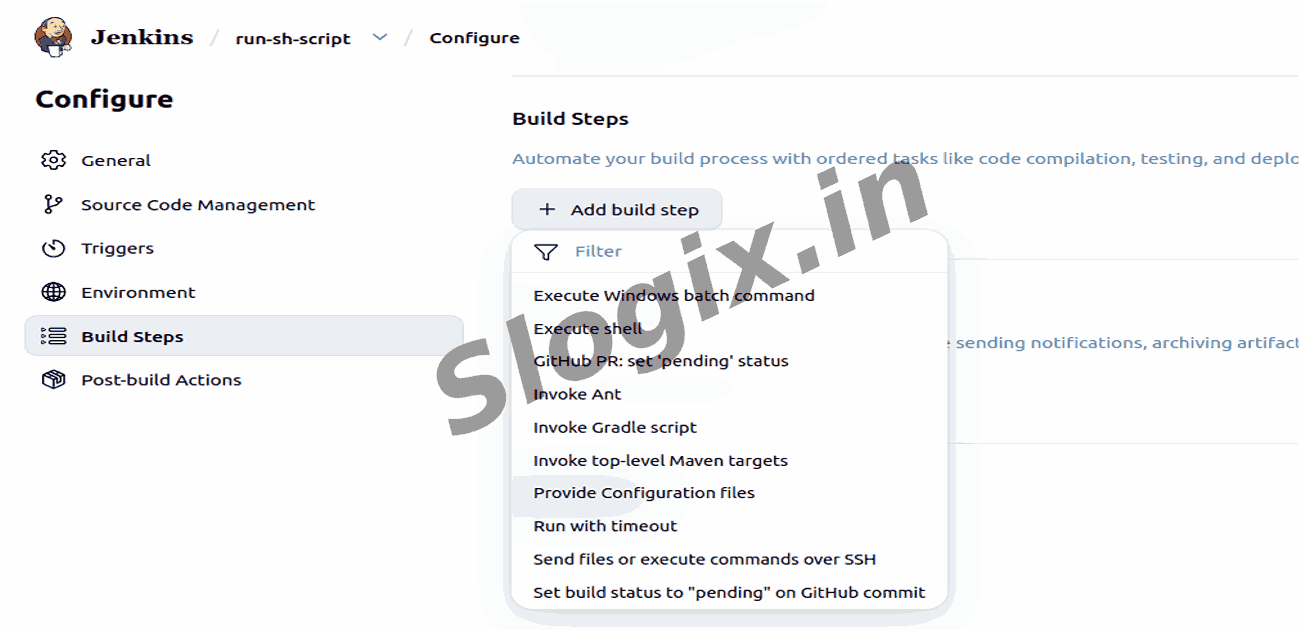
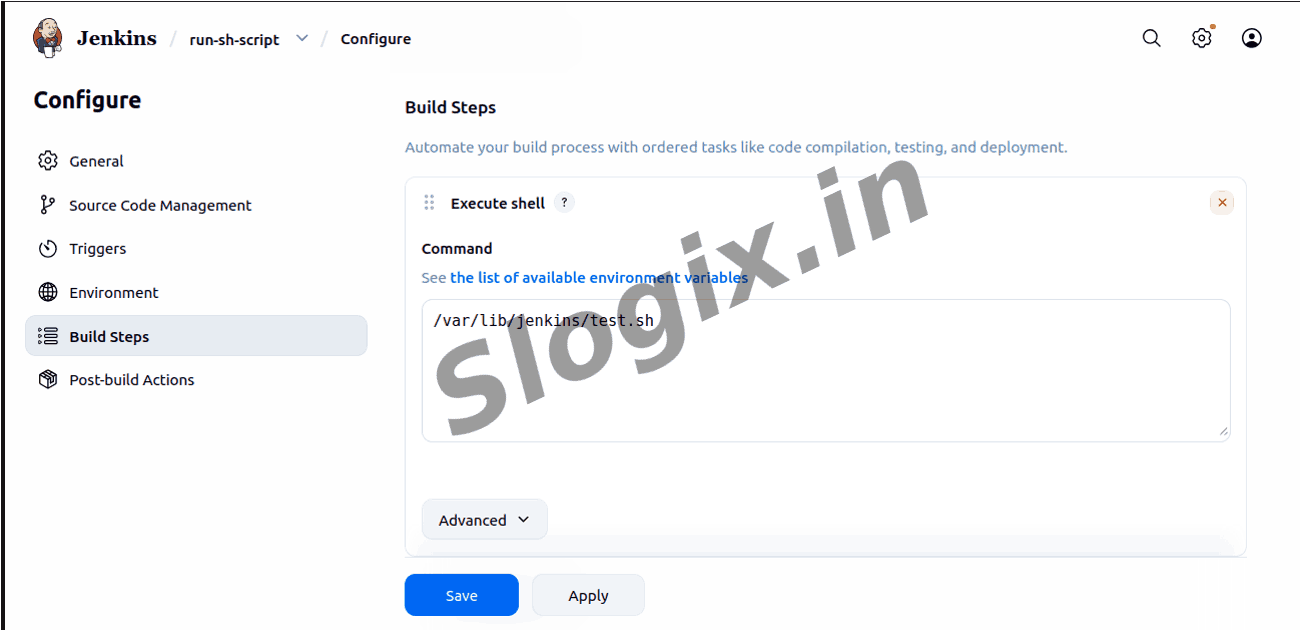
Step 5 — Add a Build Step
Go to Build → Add build step → Execute shell
Enter the script path:
/var/lib/jenkins/test.sh
-
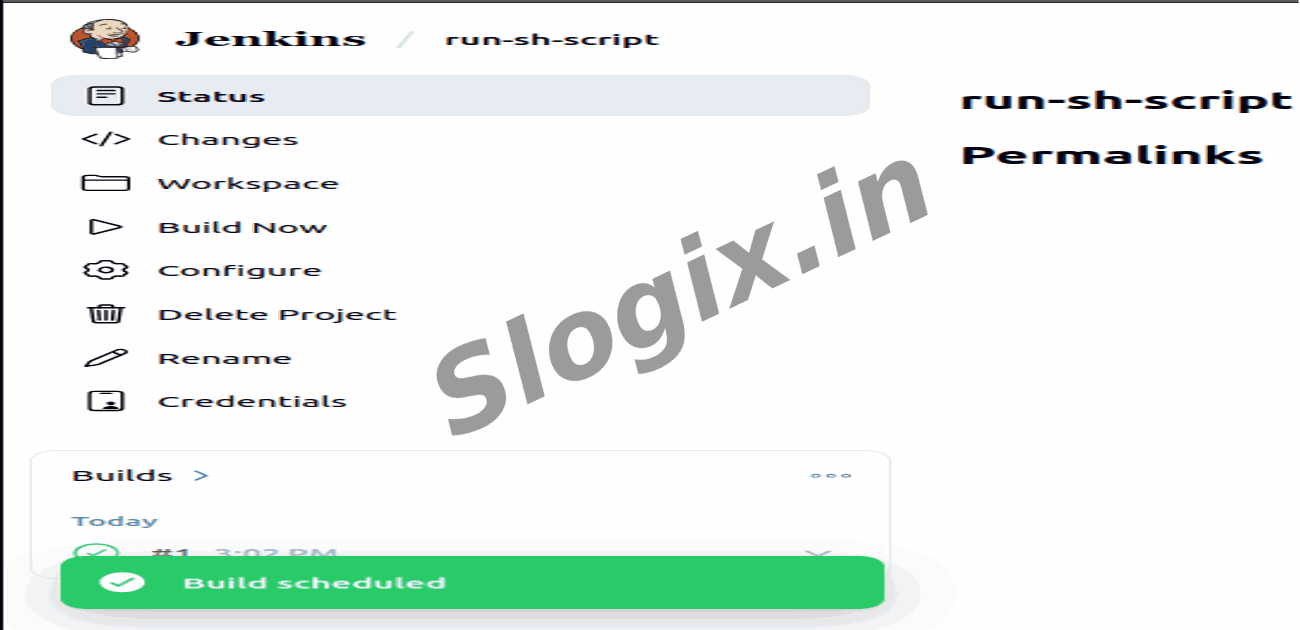
Step 6 — Save & Run Job
Click Save → Click Build Now
-
Step 7 — Check the Output
Under Build History, click Build #1 → Console Output
You should see:
Script executed!
Finished: SUCCESS
-
Goal
Jenkins successfully executes an external shell script, allowing you to automate tasks stored in script files.
 Research Breakthrough Possible @S-Logix