Condition for Create the First Freestyle Job in Jenkins
Description: A freestyle job in Jenkins allows you to execute basic automation tasks such as running shell scripts, compiling code, copying files, or performing simple build operations. In this task, we create a Freestyle project and configure a simple Shell command that prints a message to verify that Jenkins is working correctly.
Steps
Step 1 — Open the Jenkins dashboard
Start Jenkins and open a browser to http://localhost:8080 (or your Jenkins server URL). You should see the Jenkins home page.
Step 2 — Create a new job
On the left menu click New Item to begin creating a new job.
Step 3 — Name the job
In the Enter an item name field type first-project.
Step 4 — Choose job type
Select Freestyle project and click OK.
Step 5 — Find the Build section
On the job configuration page scroll down until you reach the Build section.
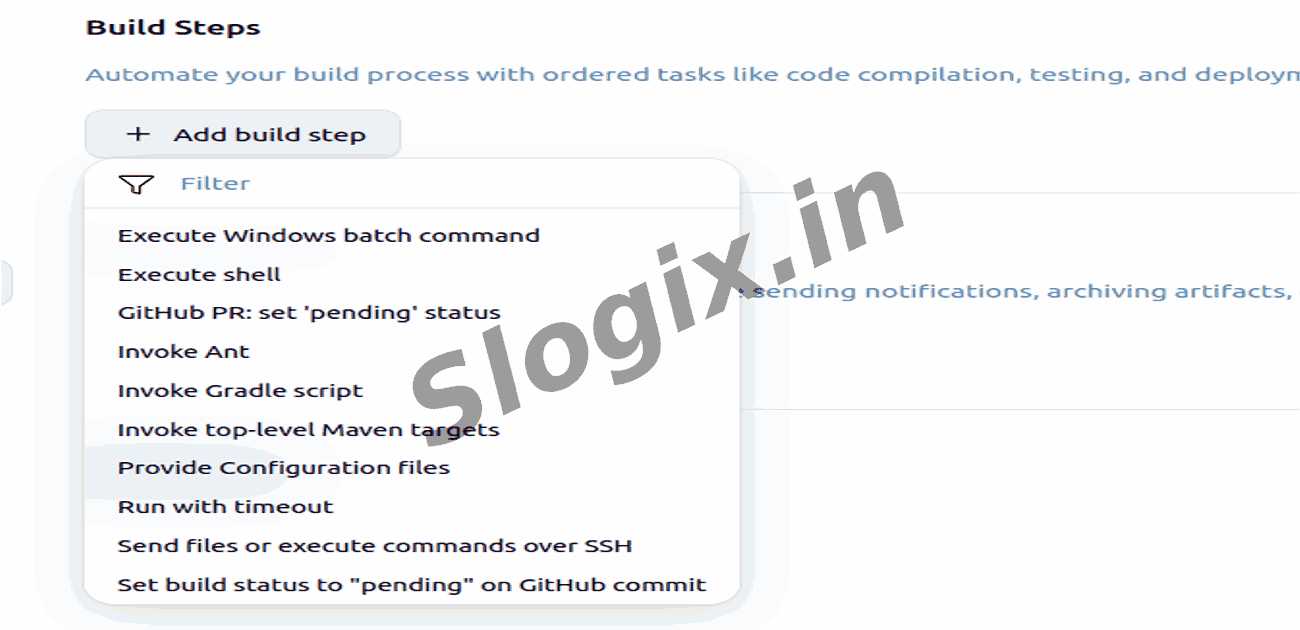
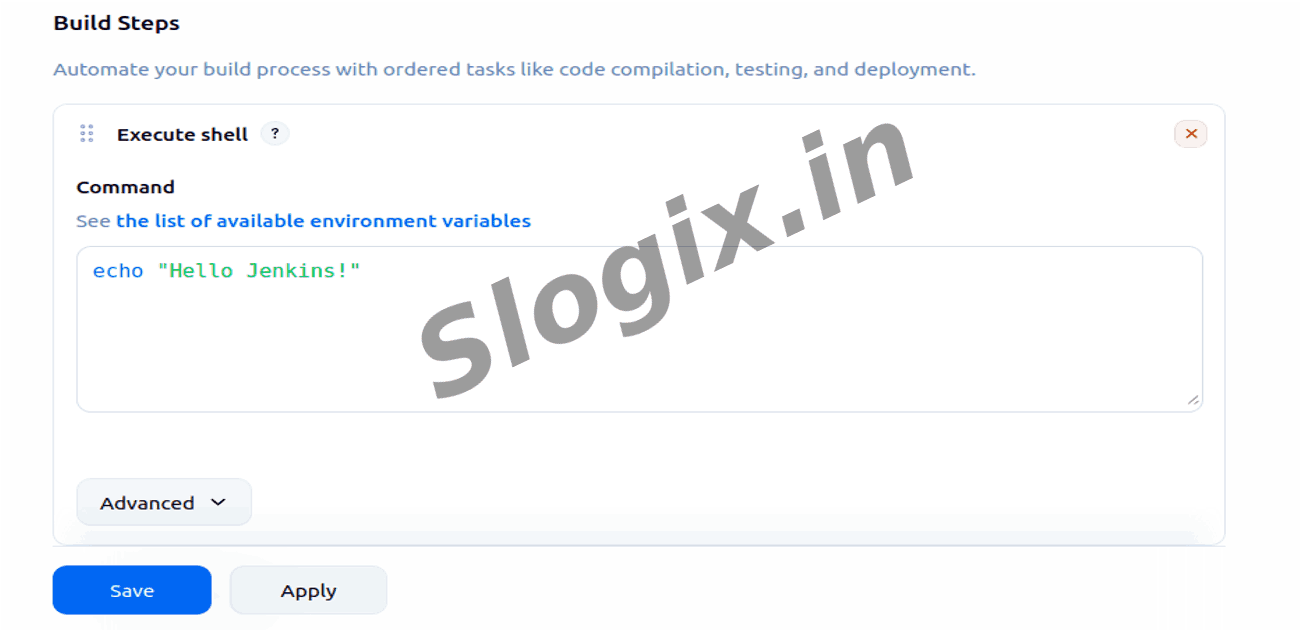
Step 6 — Add an “Execute shell” build step
Click Add build step and choose Execute shell from the dropdown.
Step 7 — Enter the shell command
In the shell text box type the command:
echo "Hello Jenkins!"
Step 8 — Save the job
Scroll to the bottom and click Save to store the job configuration.
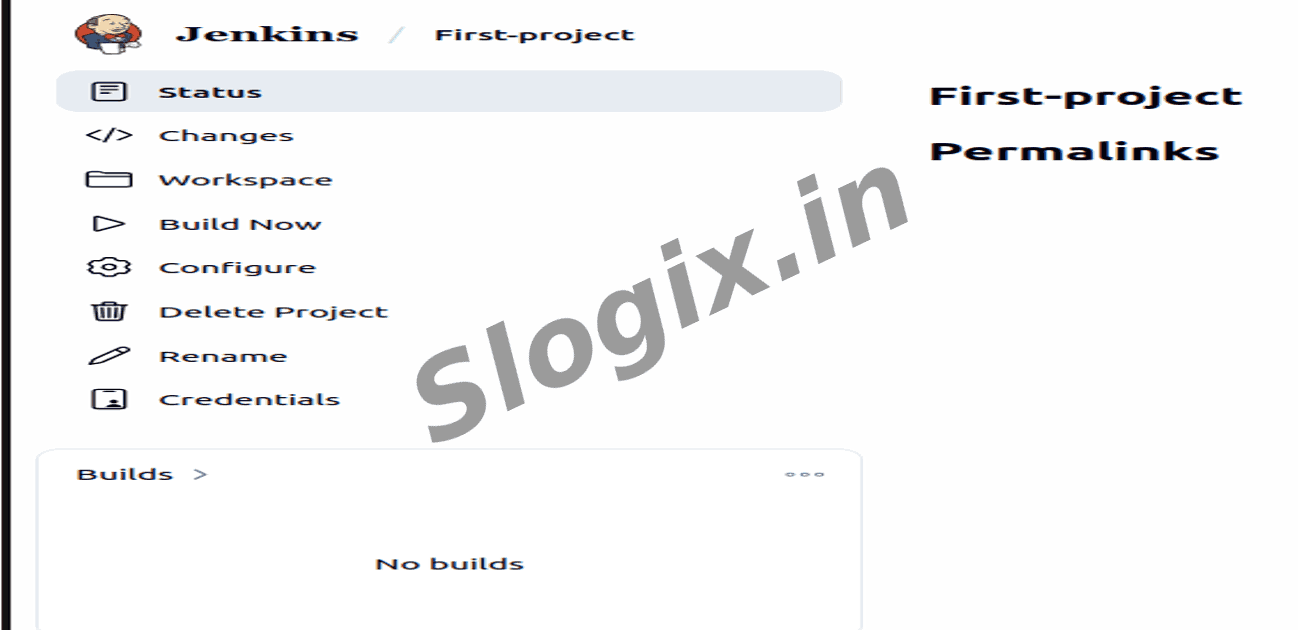
Step 9 — Run the job
On the job page click Build Now (left panel) to start a new build.
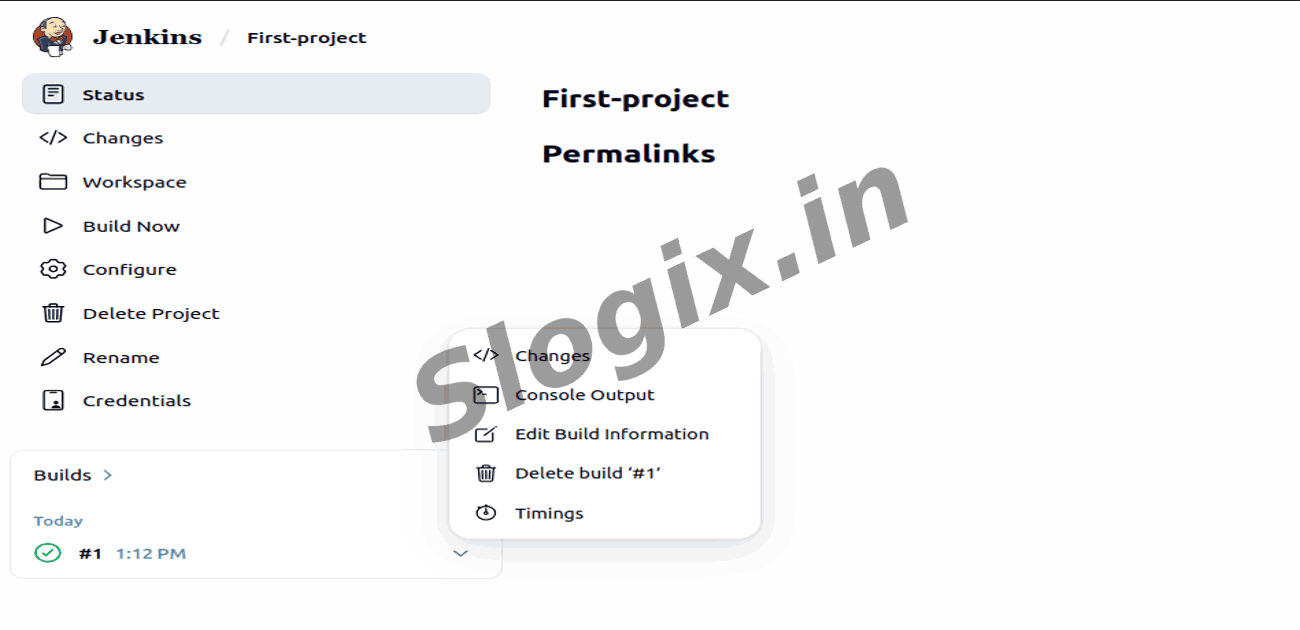
Step 10 — Open the console output
In the Build History area click the newest build (it appears as a # number), then click Console Output to view logs.
Step 11 — Verify the output
In the console output you should see the line:
Hello Jenkins!
This confirms the Freestyle job ran successfully.
 Research Breakthrough Possible @S-Logix