Amazing technological breakthrough possible @S-Logix pro@slogix.in

Office Address

  • #5, First Floor, 4th Street Dr. Subbarayan Nagar Kodambakkam, Chennai-600 024 Landmark : Samiyar Madam
  • pro@slogix.in
  • +91- 81240 01111

Social List

How to Create VM in OpenNebula?

  • According to the specification parameters mentioned in the corresponding VM template, a new VM is created.
  • Step 1: Start OpenNebula.

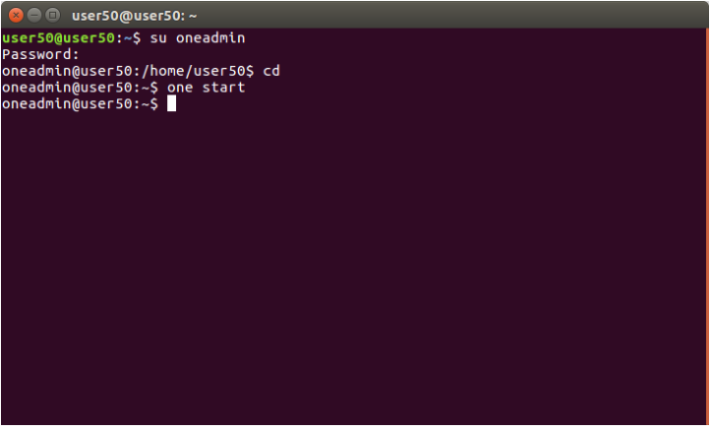
    i) Login as the oneadmin user in Terminal.
    Type the following command.
    <one start>

  • Create VM in OpenNebula

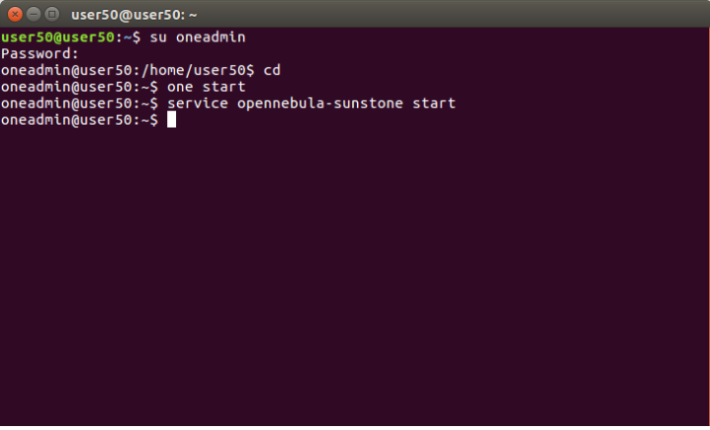
(ii) Start the OpenNebula SunStone.

Type the following command.

<service opennebula-sunstone start>

Start the OpenNebula SunStone
  • Step 2: Login OpenNebula Sunstone:

    Go to https://localhost:9869.
    Login into OpenNebula Sunstone.
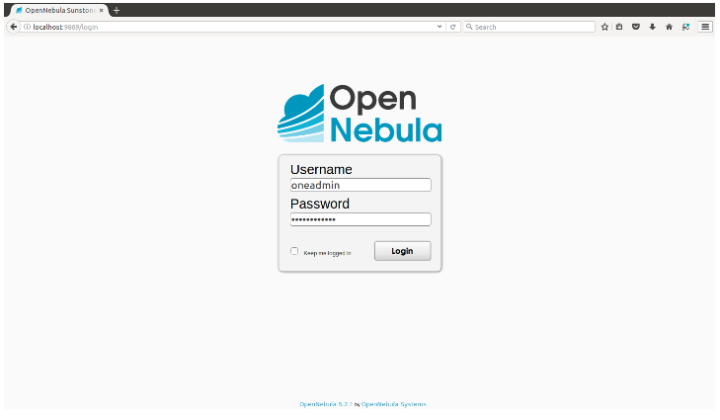
 Login OpenNebula Sunstone

Username-oneadmin.

Password-xxxxxxxxx and click on “Login” button.

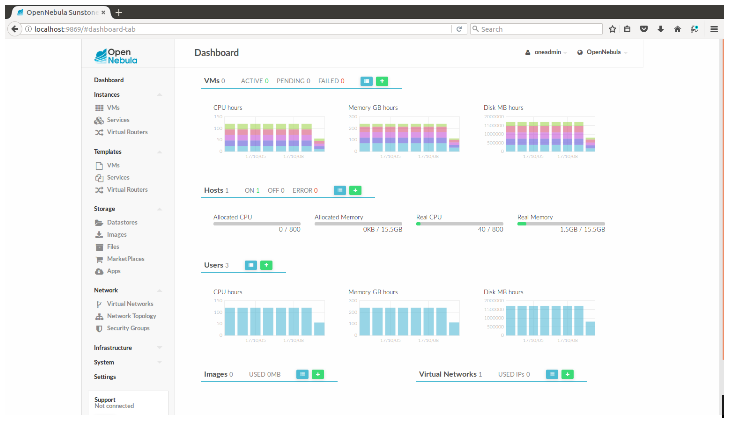
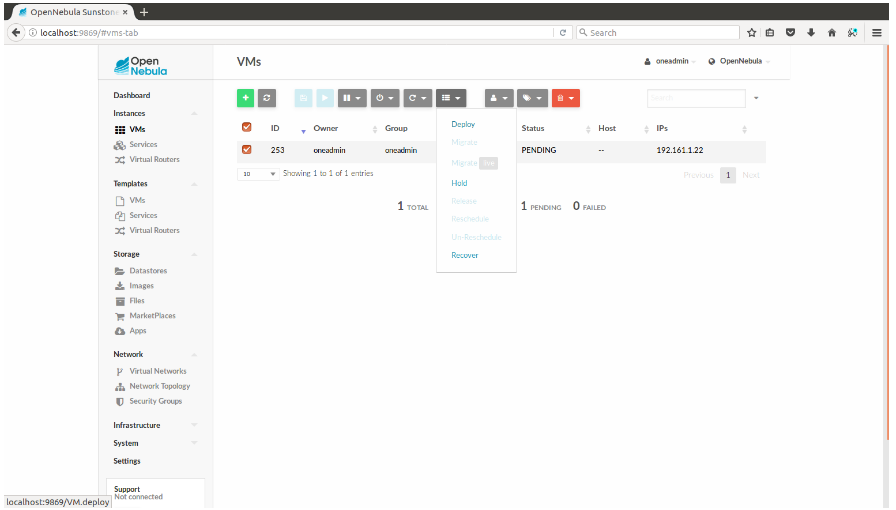
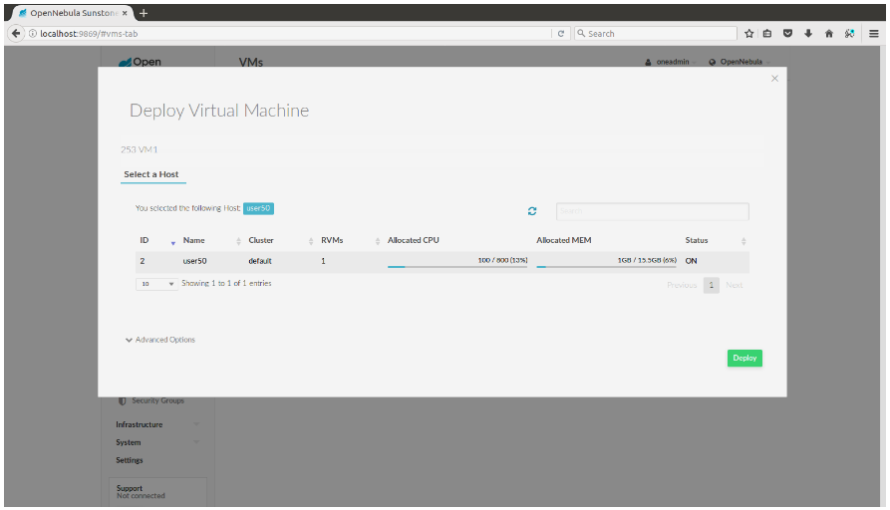
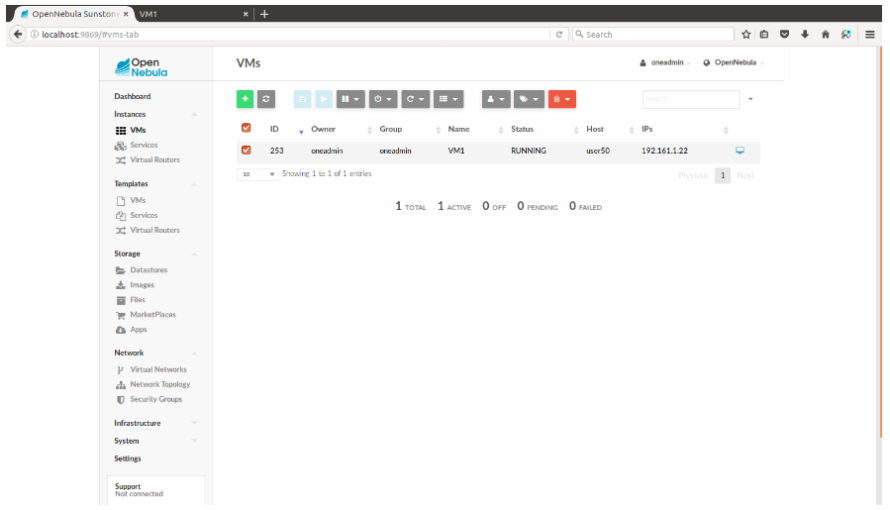
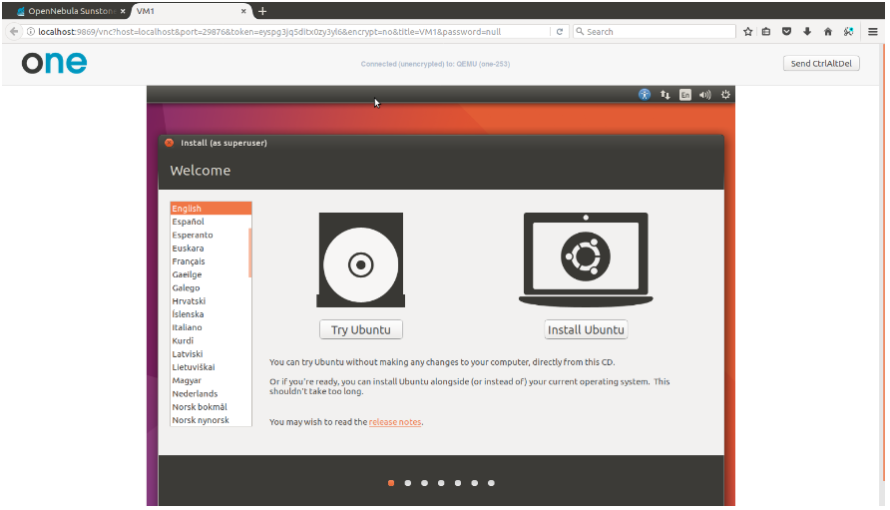
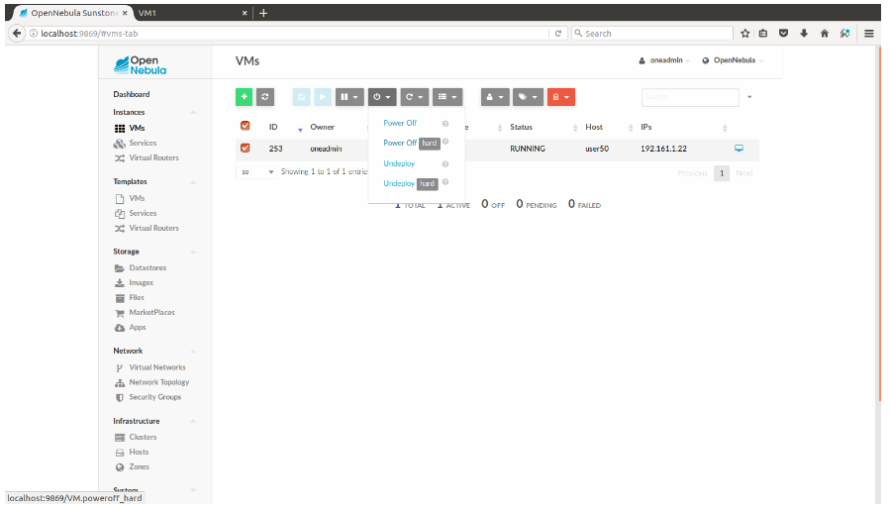
OpenNebula Dashboard screen will be displayed.

OpenNebula Dashboard
  • Step 3: VM Creation:
    In OpenNebula Dashboard, click the “VMs” under the “Instances” Tab which is appeared in the Left side menu.
VM Creation
In OpenNebula Dashboard, click the “VMs”
  • Click the “+” button to add a new VM.
dd a new VM
  • Select the required VM Templates
  • Click “Create” button.
required VM Templates
  • Click “Deploy” button and select the Host machine.
select the Host machine

  • VM is in Running State.
  • Open the VNC icon and install the OS.

  • Click “Install Ubuntu”.
Install Ubuntu
  • Tick all box and click “continue” button.
Tick all box and click “continue” button
  • Select “Erase disk and install Ubuntu” and click “Install Now” button.
Install Now
  • Click “continue”.
Click continue
  • Select the timezone as kolkata and click “continue” button.
select the timezone as kolkata
  • Select keyboard type as “English(US)” and click “continue” button.
Select keyboard type as “English(US)”
  • set the VM username, password and computer name.
set the VM username,
password and computer name
  • Click “Restart Now” button.
“Restart
“Restart the sytem
  • Click VM and select VMimage(ISO image).
  • The VM type is changed from CDROM to DATABLOCK.
 VM and select VMimage(ISO image)
  • Click VM and select VMDiskimage(Empty Disk image).
  • The VM type is changed from DATABLOCK to OS.
Click VM and select VMDiskimage
  • Poweroff the VM (Click->Power Off-hard ).
Poweroff the VM
  • Click VM and select VMimage(ISO image) -> click Detach.
Click VM and select VMimage
  • Now Ubuntu OS is installed in VMDiskImage.
Ubuntu OS is installed in VMDiskImage

  • Login the username and password.
Login the username and password.